Little Girl on Christmas Morning
Happy New Year everyone! I hope you all had an enjoyable festive season. Today and next week, I wanted to feature how I created this year's Christmas card. It is a combined linocut and collograph print of my little girl and terrier inspecting her stocking on Christmas morning.
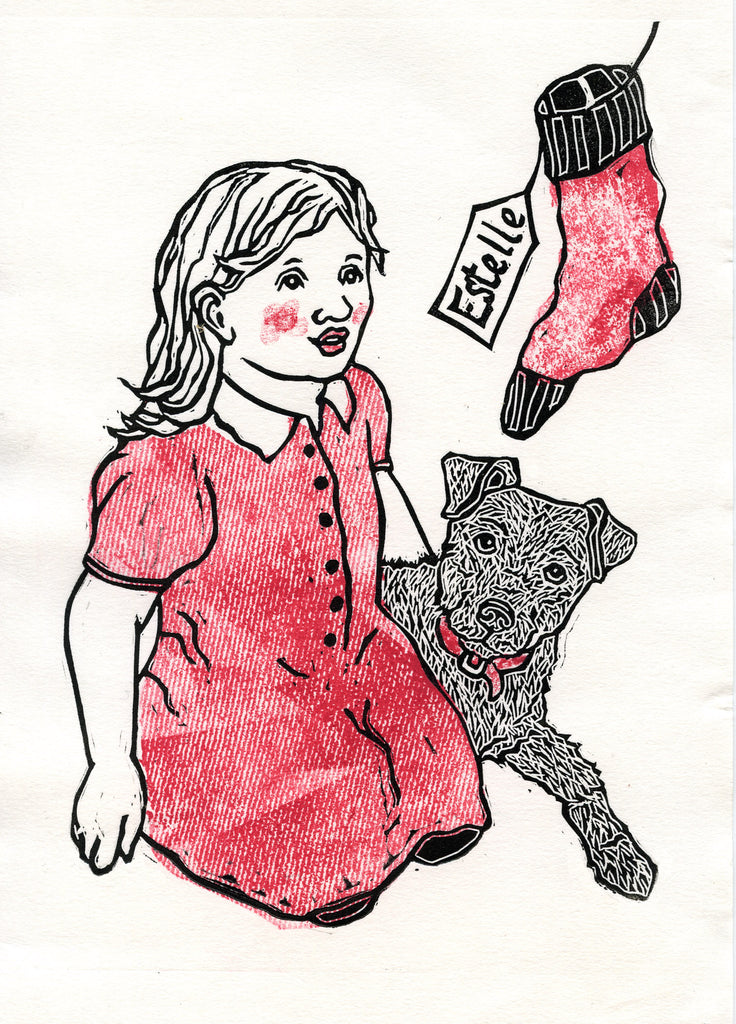
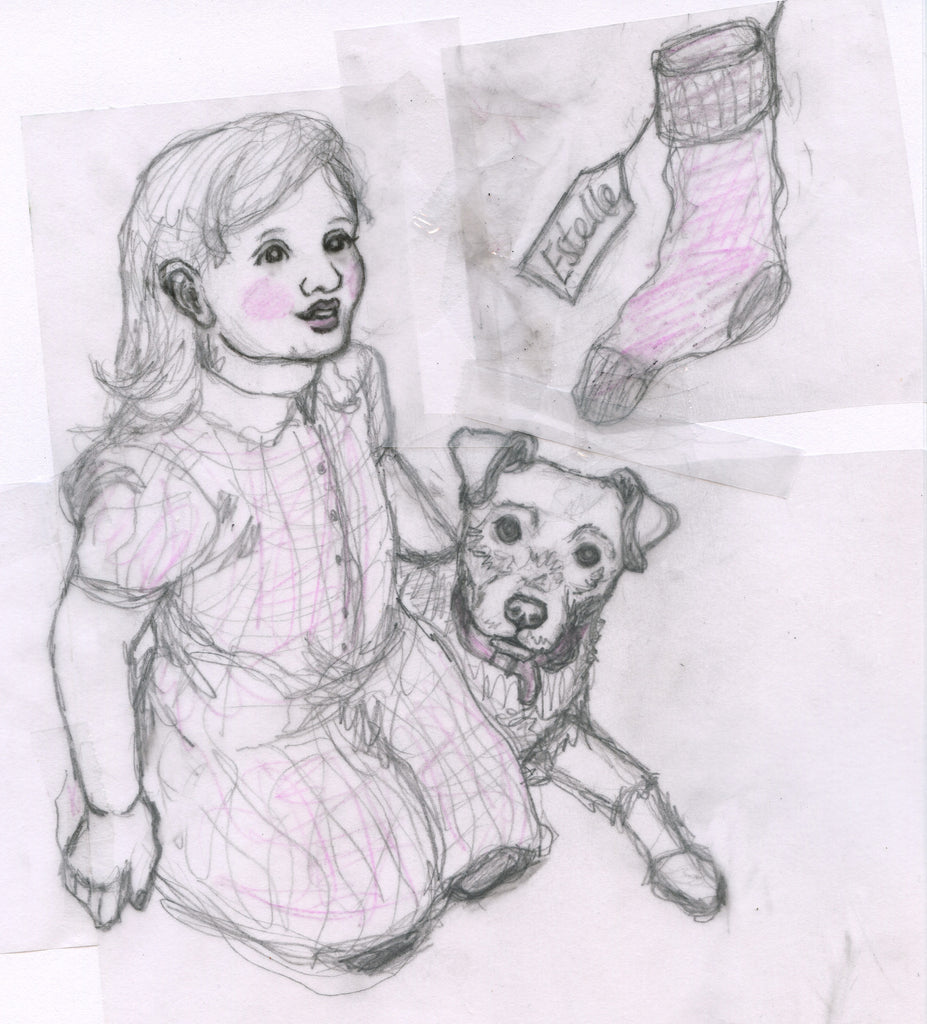
I wanted to go through how I produced this black linocut and red collograph step by step. As with any print, the first stage is an idea and working up how this is going to be rendered using a limited number of inks. You can see in the drawing below which I did on tracing paper from my original sketches. I was working out how to fit it on a standard A5 piece of paper (for posting purposes), and laying out which parts would be red, and which parts black. I made Estelle's facial features very bold to make it easier to cut them from the lino.
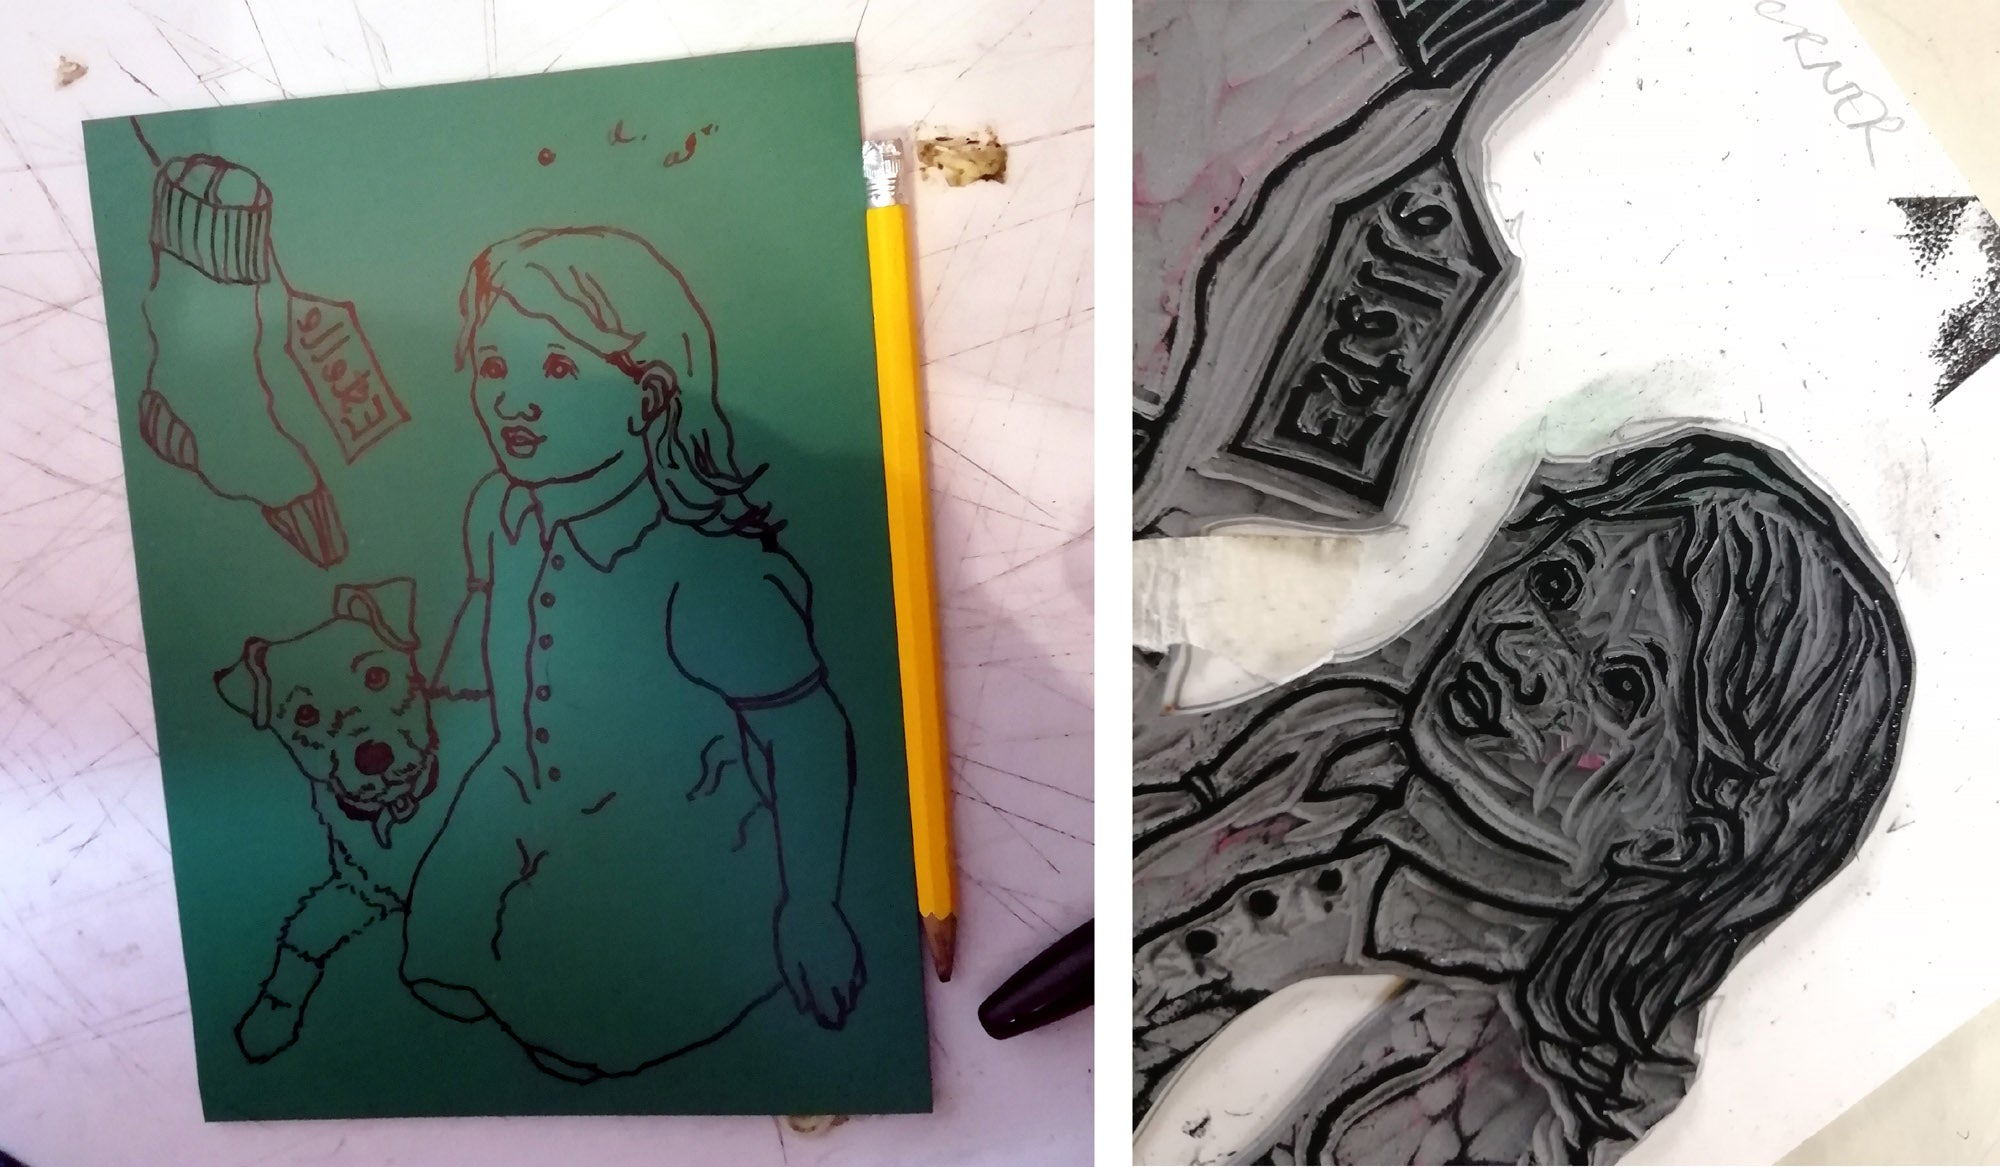
Next stage was to transfer the image onto lino. As I've written about before, when you trace an image onto your piece of lino, this reverses it. Using a sharpie marker to transfer the design also enables you to simplify it, so that you can be sure you can cut it using linocutting tools. I then printed it up in black ink to check the progress of the design.
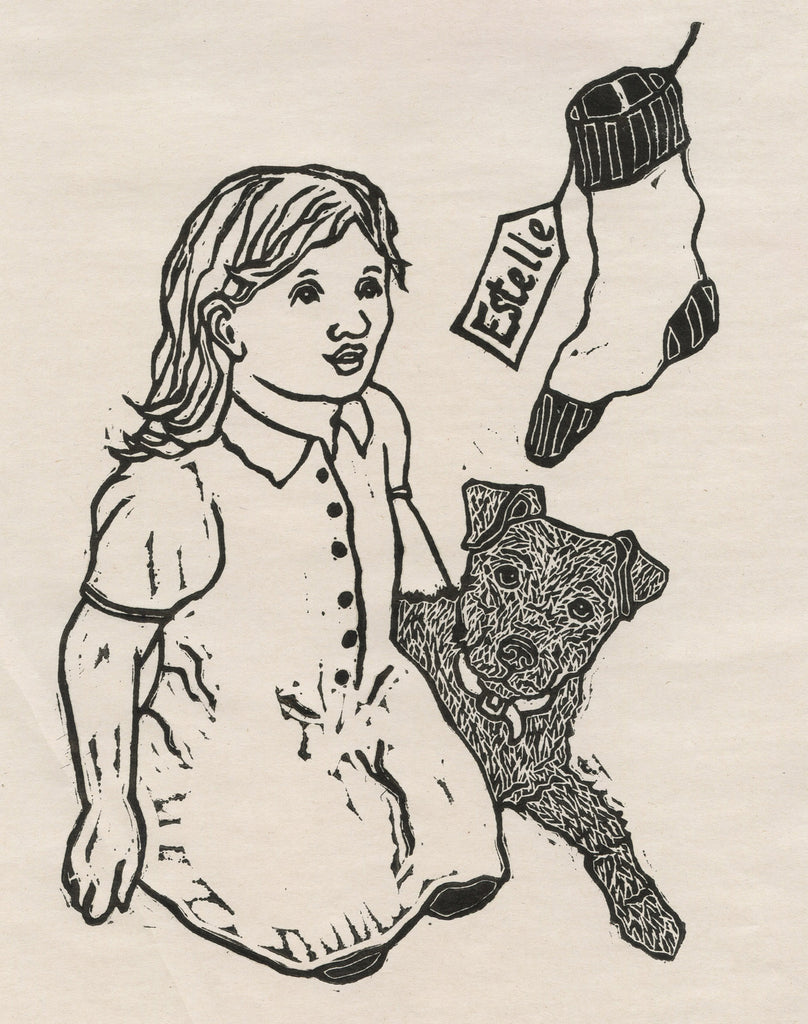
Here you can see the black linocut printed up on scrap newsprint. It looks very bare without the red areas! You can see how the process of turning an initial drawing into a linocut transforms a design. It is really important when creating a linocut of a child to keep the lines soft - it is very easy to make a face look too hard in this medium. This may suit a portrait of an adult, but not a child. Creating additional detail using a collograph will also soften the look of the design.
Next week, I will go through step by step how I created the red collograph textured background to fit with this initial black layer.