How to Make a Linocut

I could not relaunch my new website without sharing my take on how to make a single colour linocut. In this blog post, you can find out exactly the technique I use to create a one colour linocut, with some tips and tricks on the way. Below, you can read step by step instructions as to how I created my Rabbits in Burrow linocut. If you want a download of these instructions, you can get them here.
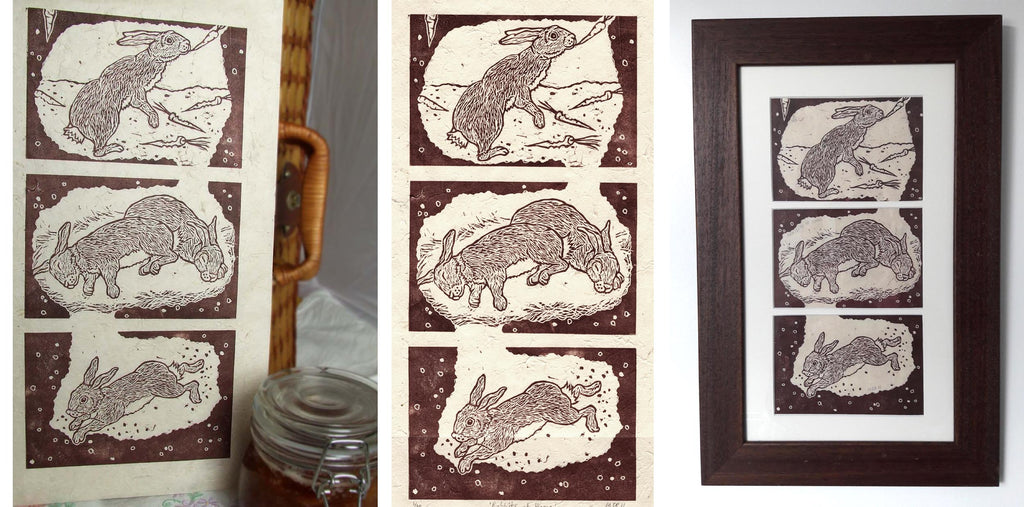
I love my linocuts to tell a story, and my Rabbits in Burrow linocut is no exception. Each of the 3 panels of this linocut tells a different part of the story, showing rabbits in their home life, or at least how I imagine their home life to be as you can see below. Read how I created the first panel depicting the rabbit stealing carrots from the safety of his burrow.
Sketch out your design first. Take into account practical matters, such as the dimensions of your paper – the rabbits, for example, are standard postcard size. Be mindful of contrasting solid and blank areas, and textured versus plain areas. Try to achieve a good balance between these. Then trace your design using a dark pencil. Transfer your design onto the linocut. Turn the tracing paper over and place it onto your lino. Tape your lino into place with masking tape to ensure nothing shifts while you’re transferring it. If it shifts, you will never be able to match it up again! Rub over the back of your tracing paper to transfer the pencil lines. Make your design legible and smudge-proof by going over your pencil lines with a waterproof marker such as a ‘Sharpie’ marker.

The next stage is to cut your design. The important thing to remember is that that the areas your remove from the lino will not print. What you leave behind will be printed up. This means that you have to think in reverse. Be very careful not to over-cut and remove too much lino.This makes it flat and uninteresting. Also, avoid cutting through any important inter-connecting lines. On the finished print, you’ll see that I accidentally cut off one of the sleeping rabbit’s ears where it joins onto the head! Cut out your design by cutting out the main subject first. Carefully go round the outside and inside lines of the design first. Then cut out the inner part, creating texture and contrast as you go. Use small tools on detailed areas, larger tools to clear large parts. You can check your progress by using a bingo marker. Colour the area you have just been cutting, lay a scrap sheet of paper on top, and take rubbing with an old spoon or your fist.

With your design cut out, you’re now ready to print. To prepare your inks, mix the colour you wish to use and make sure you have enough of the colour you are using for the size of your print run. Roll out a thin film of ink. Ink up your lino by rolling the roller through the film of ink one way until it is loaded with ink. Roll it onto the lino one way. Make sure the lino has a thin sticky film of ink all over it.

Print your Linocut. If using a press: slot your lino into place on a registration board. Carefully lay your paper over the lino. Place packing materials on top (such as newspaper and card) to achieve the correct pressure to transfer the ink. Roll the press over. You may need to experiment until you get the pressure correct. If hand-printing: slot your lino into place on a registration board and carefully lay your paper over the lino. Burnish it by rubbing the back of the paper with a spoon. Then it is time to reveal your print! Slowly lift the paper up from one corner. If the ink is patchy, carefully replace the paper and have another go with the press/spoon.
Using tissue or scrap paper, blot the print to remove any excess ink. Hang it up to dry. Edition your prints: if you print 10, number each one as being a series of 10 – e.g. 1/10, 2/10…10/10. Stand back and admire your finished print! I always LOVE the transformation of an idea captured in pencil sketch into a linocut - linocuts are so bold and attain a unique effect.
So here you can see a close up of each of the Rabbits in Burrow panels. There is a good mix of blank areas which allows the handmade paper to show through, solid colour, and textured areas. I was really pleased with this linocut! If you have a go of making any using my instructions, I would love to see them.
