Christmas Collograph
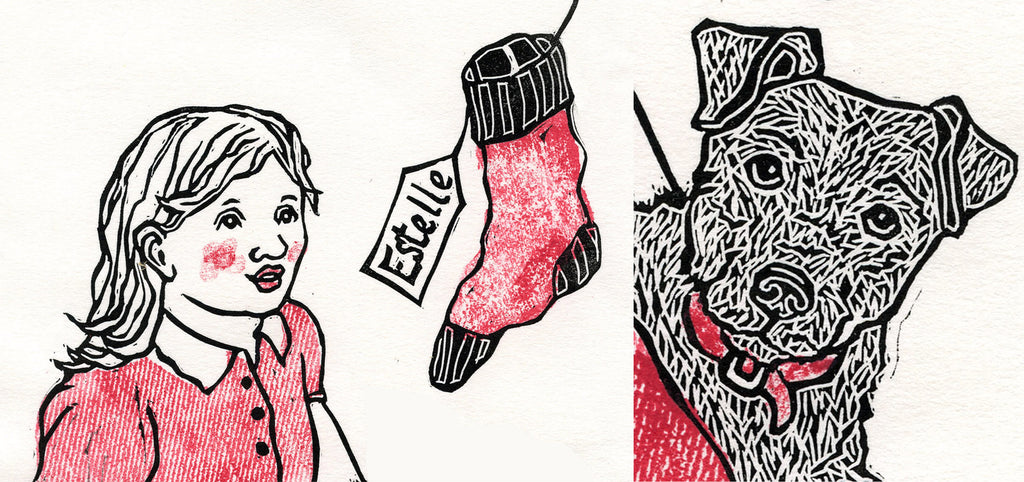
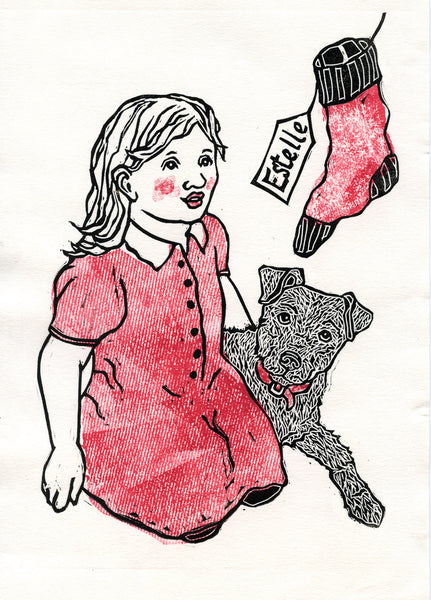
Last week, I wrote the first of two blog posts of how I created this Christmas print, of my little girl and her beloved terrier on Christmas morning. I described how I created a linocut to produce the black outline. In this blog post, I will detail how I made a collograph for the red textured background.
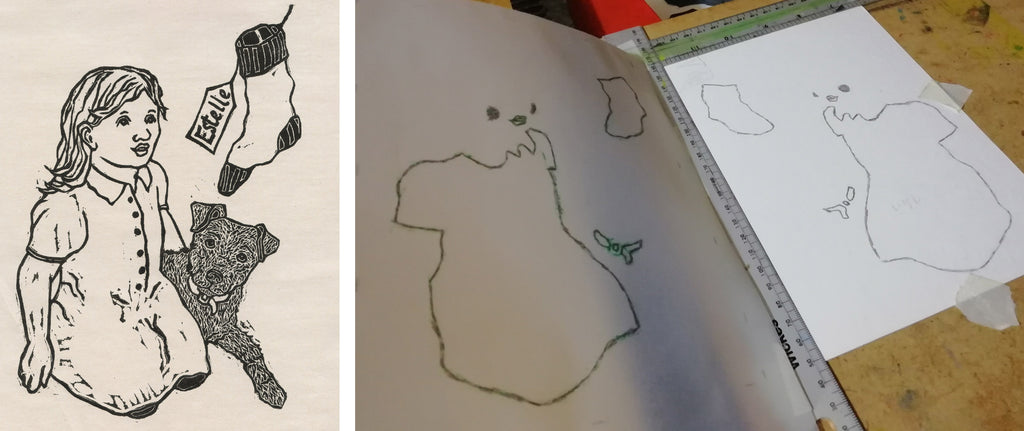
I took the black linocut block, and took a very light print of the outline of the parts I needed in waterbased ink onto tracing paper. You can see I did this in green. The technique I use for doing this is going over the outline of the linocut using a bingo marker pen; masking the tracing paper into place over it, attached to my registration board; then putting it through my printing press. This transfers the ink onto the tracing paper. I went over the ink outline with a thick black pencil. Then I cut the collograph block out the same size as my linocut block out of mountcard, and slotted it into place on my registration board. I put the tracing paper over it, and transferred the lines by rubbing on the back of the tracing paper.
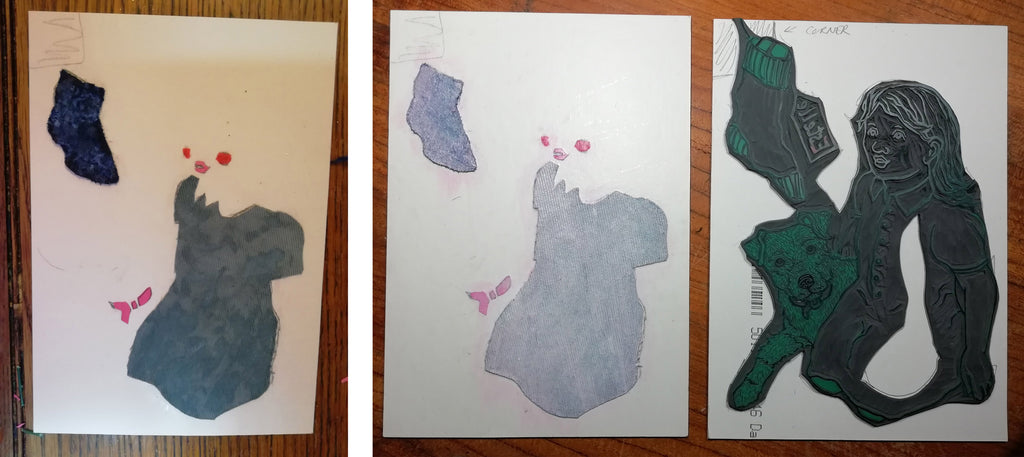
The next stage is to create the collograph. Using the tracing paper as a guide, I cut out textured jeans for the dress shape; part of a sock for the stocking (seemed appropriate); tissue paper for the cheeks and lips; and smooth paper for the collar. I glued all these in place with PVA on the collograph plate, and varnished them a few times with PVA too. I then painted them with a layer of white gesso paint, so I'd be able to see the amount of red ink better. I finished off with two coats of varnish.
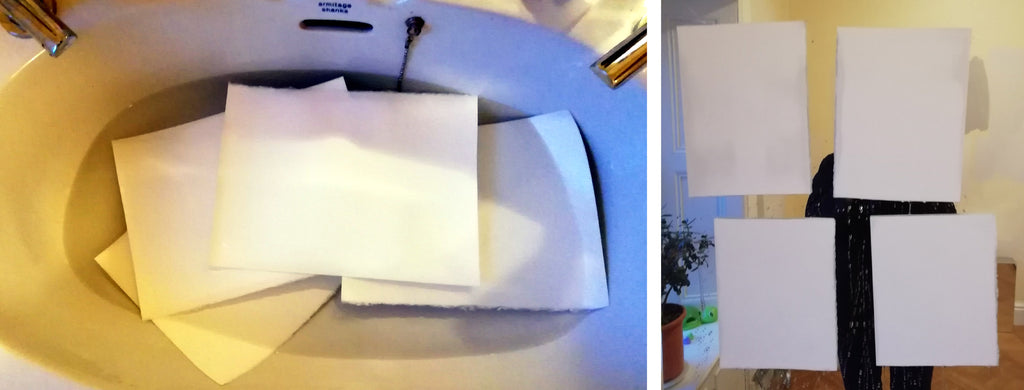
Once the collograph is completely dry, you can print it up. I used thick Fabriano paper for the print, which I soaked for about 5 minutes to make it more pliable so that it will pick up the texture of the collograph, then flattened onto our bathroom mirror. I blot it with thin paper to ensure it is not too wet.
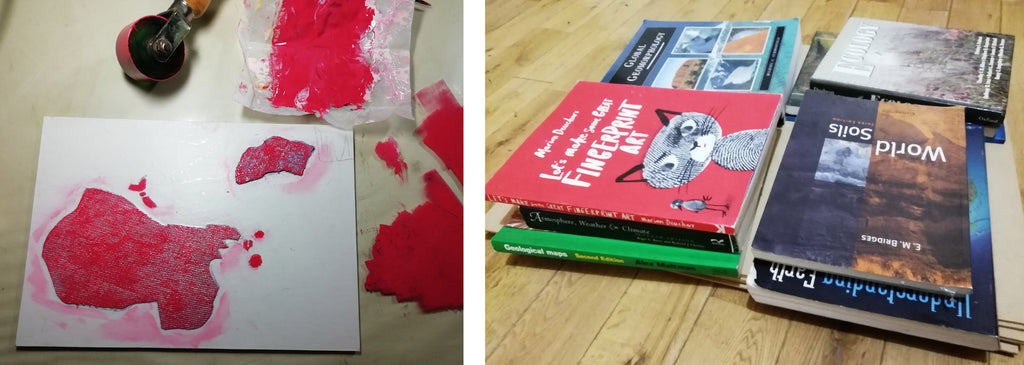
I printed the red collograph first. I used a gloopy sticky red ink, rolling it over the collograph with a small roller. I was careful to wipe away extra red ink off the background. I used a paintbrush to ink up the small collar, cheeks and lip areas. I stuck the paper into place on my registration board with masking tape - put the collograph plate through the printing press, using lots of newspaper as packing to make sure the print was transferred - and then carefully lifted the paper off, and took the plate out without removing the paper from the registration board. Then I inserted the black linocut into position on the registration board (see photos here), positioned the paper over it, and put it through the press again. Once you've printed it, it is essential that you flatten it between newsprint to soak up the water, between boards and under heavy weights for 24h.
I really love the technique of combining collograph with linocutting. I like the fact that you cannot be too precise with the collograph - as you can see with the stocking, the wooliness escapes the black outline. Yet by using linocutting, you can also achieve such detail - such as the texture of Max the terrier. Hope you feel encouraged to have a go of these techniques!